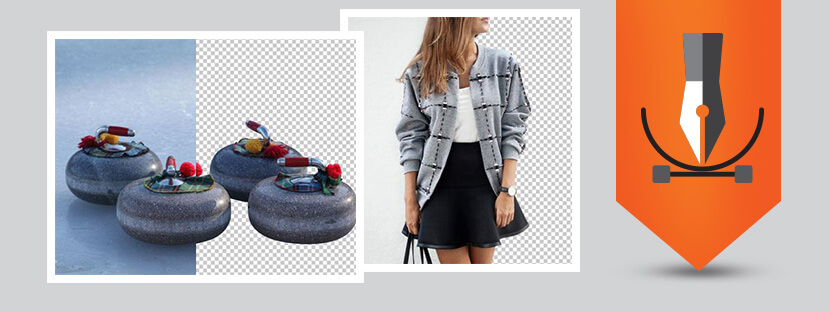
Tips to Make the Clipping Path Task Effortless and Top Notch
Any photo editing service provider would be well aware of the technique of clipping path image enhancement service. The photo clipping service providers mainly use it as a vector path to separate the image from its background by employing the advanced photo editing software such as Adobe Photoshop or InDesign clipping mask. Taking care of many things that may look trivial to everyone’s eyes can improve the ultimate quality of final product. As a professional photo editing company you should know how to make your clients delighted with the end results.

How to use Photoshop Clipping path tools
- Clipping path in Photoshop using Pen Tool
Open the image in Photoshop directly rather than opening the image from the menu. Now, open the ‘Pen Tool’ option from the menu and use the same to create a path around the image area which can become the silhouette of the image that you have opened.

If you are unable to see the Save Path, then the path has already been saved. You can skip to the next step.
- You are now required to open the Panel Menu in the Paths Panel and click on Save Path. Importantly, make sure that you name references.

- Select the Clipping Path from the same Panel Menu. Select the path that you have saved from the dialog box of Clipping Paths and click OK.

Unless you want to change the value of the Flatness Device Pixels, you can leave the text field blank. As you would know, the flatness values can determine the number of device pixels that have been used to create the silhouette. If the values are higher, the number of points created will be fewer increasing the swiftness of processing. However, speed can affect appeal of the image; higher flatness value results in straight edges instead of the more desirable curved edges.
- Choose the Save As option in the file and select the Photoshop EPS in the format dropdown. Another dialog box would open in the EPS Options dialog box. Give OK to the defaults.

Clipping path with magic wand tool
If there are right tools at disposal, a graphic artist can do almost anything with effortless product editing. Photoshop image masking tools can help a creative professional to go those extra miles to come up with exceptional outputs including the visualization of curved piecing of various elements. For magic wand tool photoshop, there is no need to drag around and you can simply take it from menu. You can select the needed specific part to copy, edit or mask; i.e., there is no need to trace any specific path.
Thus you can make use of countless tricks as per the color properties of pixel. You may press the ‘W’ key to select magic wand tool. Then make the click within the specific area that needs to be edited. Post that, you may use normal menu to add or subtract elements from concerned image. The said option is manipulated with sample of various layers, contiguous, tolerance and anti-aliasing. Let us see in detail how to use magic wand tool to remove background.
- Start by opening the image that you want to mask. Get an access to the Photoshop file menu and then click open. You can pick the needed file and it would be good if you duplicate it for the training purpose.

- After the access of file, go to tool box menu and select Magic Wand Tool. You can get it by clicking on Tools option in windows menu.

- Now, select white background that you want to remove; automatically, all white areas inside the view will be selected.

- It is always advisable to create a duplicate outlay of image, at the point. Conceal the original one; just switch of visibility icon. For the same, click delete key.

- In the layer palette, towards the bottom, you can see the option of ‘create new layer’. You can input the desired color by making use of color picker or else you may paste from background image to make the needed selection.

- ‘Gradient Tool’ can now be selected and you may add this color on to new layer. See both color and image layers together to have an idea regarding the final output.

Also, any other image, effect or color can be tried. Even if you are not a professional designer mastering all different photo clipping methods, you can remove background Photoshop using magic wand tool quite easily.
Conclusion
“Clipping Path” is a necessary technique for high-end photo editing, and it is essential to get it right. A well-defined clipping path enhances the quality of an image and makes it look cleaner and more professional. Follow these tips above and optimize the images for marketing and advertising purposes.
Professional photo editing agencies have highly skilled experts with years of hands-on experience. They are trained in various image editing techniques and methods. Collaborate with such an agency if you need professional image clipping path services. Team up with reputed agency and get the best photo editing support at an affordable cost.


