11 Useful Retouching Tools in Photoshop Explained
Among many tools that are available for refining captured snaps, Photoshop Essentials has always been the most preferred option for image retouching service providers.
While using this software program, professionals should use Photoshop features in the most appropriate way so as to deliver best possible results. While experienced professionals can use Photoshop very easily, beginners or amateurs may find it difficult to explore the most powerful features of Photoshop in the best possible way.

This article would let you know about the most commonly used photo retouching tools in Photoshop, which would help you make the most out of the powerful photo editing program

Best Photo Retouching Tools that you can use in Photoshop
Photoshop includes 8 main photo retouching tools that professionals use to deliver awesome finishing touches to photos. Retouching images are made easier through the use of these tools that you can find in the tools panel Photoshop:
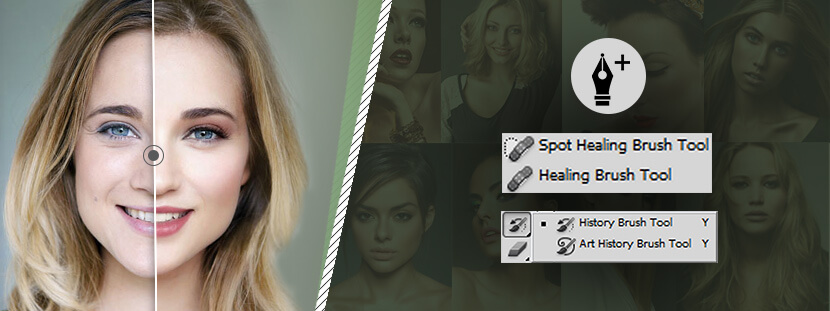
Healing Brush Tool

The healing brush tool is used to eliminate blemishes, imperfections, and irregular skin tones. The healing brush tool works by taking sampled pixels from an image and allows professionals to smoothly blend the flaws into the image. Notably, besides copying sampled pixels, a healing tool can also copy texture, shading, lighting, and image transparency.
Here’s how you can use the healing tool to remove blemishes:
- Select the healing brush first.
- Make adjustments to the brush as per your requirements.
- Press Alt + Click to label a sample point.
- Apply the brush over the area that you wish to rectify.
Spot Healing Tool

The spot healing tool functions in the same manner as the healing brush, but the only difference is that you do not need to select the sample pixels. The spot healing tool would automatically match the sample from the adjoining pixels. This tool delivers results faster than the healing brush, but you would still need to use the healing brush tool to make the outcomes more precise and accurate. In order to use this tool, you should select the Spot Healing Brush tool from the toolbox. If required, you may choose to select the patch tool, the Healing Brush tool, or the Red-Eye tool to display the hidden tools in order to create your selection. Go to the options bar and select a brush-size. You must ideally choose a brush that is a bit larger than the area that you are working on. This would allow you to cover the entire area with just one click. Another way to use the Spot Healing Brush tool is to select a blending mode from the option bar’s Mode menu. Select “Replace” to retain film grain, texture, and noise at the edges of the brush stroke if you apply a soft-edge brush.
Red Eye

Camera flash can cause red eye effects. With Photoshop’s red-eye tool, you would be able to nullify the red-eye effect in the following way:
- You will find the red-eye tool in the toolbar section.
- You will now have to click on the red-eye option and the red-eye effect will be cleared automatically.
If you think that further improvements can be made to the outcomes, you may consider adjusting the pupil size as well.
Patch Tool

The patch tool is used to edit or repair selected sections in an image. This tool can also be used to match the shading and texture of a pixel selection. In order to use this tool, you can just select the tool from the same palette and make a selection surrounding the element that you wish to remove. Next, pull the sampled section to the area with which it needs to be blended.
Content Aware Tool

The new edition of Photoshop features an advanced Content Aware tool. This tool functions in a similar way as the patch tool and helps professionals to recreate images and to adjust them as per their photo retouching outsourcing requirements. This tool can be used to eliminate unwanted objects from images. The fill-tool, which is a part of the Content Aware tool, allows for the automatic detection and filling up of the image background. This tool can be used to compare the surrounding image content to fill the selection flawlessly while retaining key details with regard to object edges and shadows. Go to the options bar and click Sample All Layers to create a data sample from all noticeable layers. Now, deselect Sample All Layers in order to create a selection only from the active layer. You should select the area that you want to enhance or modify or alternatively, you should use the click-and-drag feature to fix defects over a larger area.
-
Clone Tool

The clone tool allows professionals to create a copy of the selected area and to paste it onto any section of the same image or in another image. In other words, this tool supports the creation of duplicate images. The same tool can also be used to remove or conceal unwanted elements from images.
-
Dodge & Burn Tool

You can lighten or darken image pixels by using the Dodge and Burn tool. This is the most useful tool to make changes to midtones, shadows, and highlights in images so as to make images appear darker or lighter. When you use the dodge tool and paint again and again over an image, it will get lighter and lighter. On the other hand, the more you apply the ‘Burn’ feature, the darker the image would become.
Blur & Sharpen Tool

The Blur and Sharpen features are powerful image enhancement tools. When you use the Blur tool, you will be able to bring the main subject into focus by making the background fade out. The Sharpen tool increases the pixel contrast. The blur tool can also be used to soften rough edges or sharp objects. You can even use this tool to create artistic elements.
The Color Replacement Tool

This is a very handy and frequently used tool, which is used to replace one color with a new color. This tool is also used to nullify red-eye effects. You can use the tool very easily. Start by selecting the tool from the Toolbar. Select the color that you wish to use in place of the existing color in an image. Next, define the tool parameters in the Options Panel. The parameters are basically your specifications for brush-shape and size, the blend mode of the color, opacity, color choice mode, etc. Then finally click on the color that you want to replace with a new color.
The Pattern Stamp Tool

This tool is used to draw repetitive patterns. You can use this tool optimally to design frames or patterns for wallpaper or to retouch image texture. Users need to select a pattern from the Pattern Palette in the Options Panel. To use this tool, you should start by selecting the tool from the Toolbar. Now, choose a pattern from the Pattern Palette. Next, select the shape, size, degree of pattern opacity, blending mode, and other tool specifications from the Options Panel. Pull the tool into the image by pressing the left button of the mouse. You can use the Patch tool and the Healing Brush with a repeating pattern. When you use the Healing Brush, access the tool’s options and select a pattern from the Pattern Palette. You can do the same thing with the Patch tool by using it to draw a line around a selected area. After this, select a pattern and then click the Use Pattern option.
-
Remove Tool

The latest addition to Photoshop’s photo retouching arsenal is the Remove tool. It leverages an intelligent technology to eliminate redundant objects from an image when the editor brushes over them. This intuitive tool then automatically fills in the background in a non-destructive way, preserving the objects’ integrity and depth. This tool is especially handy when working on complex and varied backgrounds with too many unwanted objects scattered. To use this tool, go to the group of tools options, select “Remove Tool”, and then choose your brush size. Now, drag the brush over the respective objects you want to remove. If the “Remove” option after each brush stroke is turned off by default, click the “Apply” button in the options bar.
Conclusion
If you are a new Photoshop user, you may still be in the learning process. Practice makes outcomes perfect and so you should make sure that you take proper time to learn and master the features of Photoshop and put them to their best use. Photoshop is a powerful tool and when it is used properly, it can deliver awe-inspiring outcomes.
On the other hand, if you fail to capitalize on what Photoshop has to offer, you will miss the opportunity to develop yourself as a leading professional in the photo editing domain.
However, if you are keen to experiment with Photoshop yourself and are ready to adopt a do-it-yourself approach, you may consider following the above-mentioned tips so as to be able to get quality photo editing outcomes.
Such companies employ experienced professionals who are adept at using Photoshop retouching tools and can deliver awe-inspiring outcomes.


