Mastering Photoshop: Essential Tools and Functions for Beginners
Photoshop is one of the most powerful tools for designers and photo editors. In this article, you will come to know about the common Adobe Photoshop tools and uses. We have explained about Photoshop for editing the images, as it is the most extensively used tool. Here, you will get a basic concept about the different tools present in the toolbar in Photoshop software, the contents in the menu and the palettes you find on the right hand side of the screen.
Photoshop Toolbar
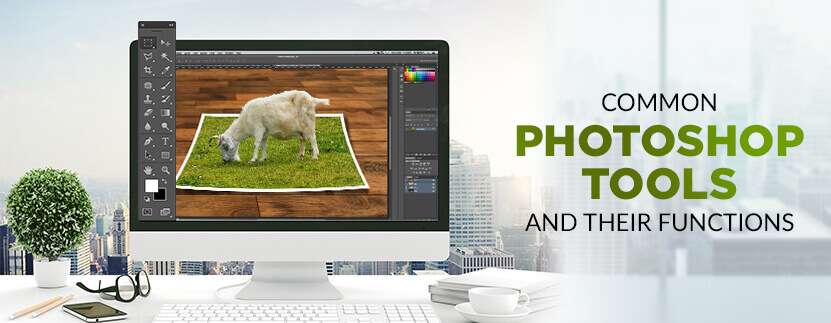
When you open Photoshop, you will come across the toolbar along the screen’s left.
Changing the Columns of Toolbar
The Photoshop toolbar appears as a single, long column by default. You can lessen the height of the column by making it double once you click the icon of ‘double arrows’ located on top. If you click the icon again, the Toolbar would again assume single column format.
-
Layout of the Tools
The tools’ icons in Toolbar are neatly organized although at the first glance, they may seem to have random listing. But it is not so as grouping of related tools are done in logical manner.
The ‘Move and Selection’ tools are situated on the top of tools panel in Photoshop. The ‘Crop and Slice’ tools sit beneath them. ‘Measurement’ tools come next. After that, you will come across different tools for ‘Retouching and Painting’ followed by ‘Drawing and Type’. The ‘Navigation’ tools are located at Toolbar’s bottom.
Tools that are Hidden
A unique icon represents each tool in Photoshop CS6 toolbar. Apart from visible tools, other tools are available too. If you want to view them, you need to click on the small arrow of any tool icon’s bottom right corner. Majority of tools have different sub-tools under them.
For viewing and accessing them, you need to hold on the icon after clicking it. You can also right click on the icon (for Windows OS) or Control Click it (for Mac OS). A fly-out menu would appear displaying all available sub-tools.
If you, for example, apply the aforesaid method on the icon of ‘Rectangular Marquee Tool’, you will get a fly-out menu carrying ‘Elliptical Marquee Tool’, ‘Single Row Marquee Tool’, and ‘Single Column Marquee Tool’. You can choose the desired tool.
The Default Tool
‘Default Tool’ is the one that is originally displayed as icon within the toolbar. It is not necessary that the default tool would always be displayed by Photoshop. The tool which you had selected last will be displayed. If you choose ‘Single Row Marquee Tool’ from the fly-out menu, it would be displayed in place of the default ‘Rectangular Marquee’ tool. You will have to follow the steps mentioned above for accessing the ‘Rectangular Marquee’ tool from ‘Elliptical Marquee’ tool icon’s flyout menu.
Customizing Photoshop Toolbar
There are different ways of customizing the Photoshop toolbar.
Move Toolbar
If you want to move the toolbar of Photoshop CC 2018 to other on-screen position, you have to navigate to the Toolbar’s top. Over here, after clicking on the vertical line series, you can drag the toolbar to any location on screen. The Toolbar would no longer be anchored to its default spot.
Use Columns
For making Photoshop CC 2018 Toolbar appear in 2 columns, you need to navigate to the Toolbar’s top for clicking on the 2 triangles. This will make the tools appear in 2 columns. For toggling back the Toolbar to single column, click again on the triangles.
Add or Remove Tools
If you are not able to figure out some tools in the Photoshop CC 2018 Toolbar, you need to click on the 3 dots situated at Toolbar’s bottom (located above background and foreground color squares). This will also help you in customizing the tools appearing in the Toolbar in Adobe Photoshop.
After clicking on dots, you can view the tools which have been removed in the dropdown. If Toolbar’s setting is default, you have to access the ‘Customize Toolbar’ window after clicking on the ‘Edit Toolbar’. From here, you can choose the tools which will be visible on the Toolbar. You can move rarely used tools away from default Toolbar to ‘Extra Tools’. For this, start by clicking on the tool to be moved out of Toolbar column and then drag the same to ‘Extra Tools’ column. You can restore the tools by dragging them back to Toolbar column from Extra Tools.
Toolbar’s Background and Foreground Colors
In Photoshop CC 2018 Toolbar, just beneath the 3 dots lie 2 color squares. Colors of the squares will differ. One square is placed atop the other. Upon clicking on arrows placed on right and top of squares, respective colors of the squares get switched over.
Top color is foreground color whereas color of underlying square is the color of background. Each of these colors can be changed after you double-click on any color square. The Color Picker window will show up from where you can adjust the color.
The foreground color will be used for painting by default whenever you would use the Brush Tool. If you use the Eraser tool for removing a portion of any non-layered picture or move/ delete portion of any selection, the background color will be visible through removed section of the image.
What are Photoshop tools and their functions?
Here are several important photoshop photo editing tools and their functions that every photo editors must be using.
Crop tool

The cropping tool is a valuable feature of Photoshop, using which you can eliminate any unnecessary element from the image. You can simply leave out an element that you feel unnecessary in the picture. When you prepare an image for printing or posting online, you need to change its size, or remove the empty spaces from it. It comes handy in these cases. This is one of the most important photoshop editing tools that the editors should be using.
Healing brush

In order to remove small specs and scratches in the image, you can use the healing brush tool. It works like a paintbrush and allows the users to make the image more perfect. The healing brush comes useful while removing blemishes in Photoshop. The users can copy a part of the image that seems to be perfect over the scratches and specs. As a result, these elements are eliminated from the image and blend the sections accurately. The areas that are replaced will look natural when you use this tool properly. Therefore, nothing in the image will look out of place.
Move tool

Using this, you can simply move certain objects around the canvas in a given layer. This is one of the most important Photoshop functions. You need to drag after clicking on the canvas in order to use the tool. When you drag the layer in Photoshop will move along, according to the movement of your mouse.
The Marquee Tool

It is one of the most useful photo editing tools in photoshop. It comes with simple features, and can perform a number of tasks. You can select particular areas of any image using the tool, copy them, cut and crop the areas. You can choose four different shapes with the tool. These are ellipse, rectangle, single column and single row.
Pencil and Paintbrush

This is one of the extensively used photoshop elements editing tools. You can choose different types of paintbrushes in Photoshop. The users may choose a standard paintbrush, or use airbrush styles in the process. The brush tool enables the users to paint different types of shapes.
Clone stamp

Using a clone stamp, you can create a sample part of a particular image and paint other areas using it. This is an important tool, used for image editing. You can simply select the colour from one area and use it to paint another area.
Pen tool

In case you are interested in drawing vector graphics, you can use the pen tool. This is one of the most commonnly used photoshop tool for beginners. You can also use this in creating various paths.
Lasso

This free-form selection tool has to be dragged around the desired objects on the canvas for selecting them. Clicking on the tool icon will let you access other sub-tools. The polygonal lasso allows selecting objects on the canvas by clicking on strategic areas for creation of interlinked points in polygonal shape. The magnetic lasso behaves like regular lasso and additionally carries out edge detection for spontaneously snapping to them. Basically the lasso tools helps in making the selections.
Patch Tool

This facilitates drawing of a freeform outline around the defective region to select the same. The defect can be repaired subsequently by getting the selection outline dragged over the region whose texture you prefer.
Eyedropper

You have to click the desired area of the canvas with eyedropper tool for sampling the color on the clicked point. It would automatically convert the foreground color to the color which was sampled by clicking canvas part.
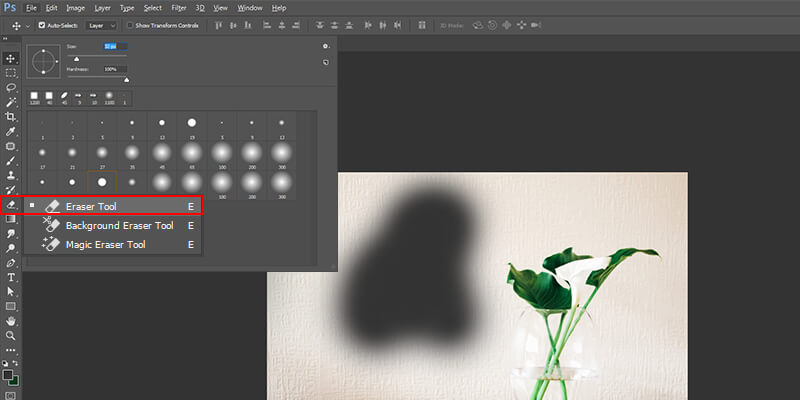
Eraser Tool

The functions exactly as the paintbrush. The difference lies in the fact that instead of painting, it erases the portion over which it is moved.
Type Tool

You can type in horizontal manner with this. The hidden tools under the ‘Type tool’ offer additional functionality of typing in vertical manner as well as creation of text masks in horizontal or vertical direction.
Hand Tool

Clicking and dragging around the Photoshop canvas is facilitated by this. This would be ineffectual if the complete canvas sits flush with the screen. After zooming in, you can easily move around using this. It also proves handy when the image is so big that it fails in fitting the screen at normal level.
Rotate View (R)

You can visualize and subsequently edit a picture from various angles by using the ‘Rotate View’ tool which actually reorients the canvas at desired angle.
Zoom Tool

Just click at a particular point on the Photoshop canvas and then zoom out or in using this. When you normally use this, it is programmed to zoom in only. For zooming out, you need to press down the option key and then start using the zoom tool in normal mode.
Color Selection

The colors that you have working with on Photoshop canvas can be managed using ‘Color selection’ tools. Foreground color is the color that sits on the top and would be used by brushes. Background color is in the back and is used when anything from the background is removed or extended. Shortcut functions can be accessed by clicking on any of the 2 smaller icons that sit on the top. One icon, that sits on the left, is represented by a black square atop a white square. Click on it would result in setting of the colors in background and foreground to defaults. Clicking on another icon in the shape of double headed curved arrow would result in swapping of the colors in background and foreground. When you click on any color in the background or foreground, a color picker would pop up which can be used for setting the color that you exactly need.
Dodge Burn, Sponge

You can lighten the areas in the picture by retouching and painting over them with Dodge tool. You can darken the areas in the image by painting over them with Burn tool. Color saturation can be increased or decreased over selected regions of image by painting over with Sponge.
Magic Wand tool

When you click on an area with this tool, the spot gets selected and other similar areas. Generally, it is used to eliminate backgrounds from the photos. In case you are willing to do photo clipping using photoshop, you will find this feature useful.
Shape tool

Users can use the shape tool to create rounded triangles, circles, vector rectangles, polygons, circles, custom shapes and lines. When you design shape masks in your photos, you will find this tool handy.
3D material drop

It is extensively used in 3D modeling. It is necessary to have knowledge on the photoshop editing techniques, which will enable you to integrate the necessary changes in the images. You can create a sample from one area of your image and use it in other areas to create similar features, like 3D layer or mesh.
Smudge, sharpen and blur tools

These are among the important photo retouching tools in photoshop, and all of them work like the paintbrush. However, they create different effects on your image. If you are willing to blur a particular area, you can use the blur tool. The sharpen tool can be used to sharpen the area, while you can use the smudge tool to smear the surrounding areas. In case you are integrating blended colours in your image, the smudge tool will come extremely beneficial.
History brush

It allows the users to paint back and keeps a record of all your activities. By default, the number of records is fixed at 50. Using the history brush, you can paint elements of the past in the present image.
Now that you are well aware of the different Photoshop tools name and functions, it will be easier for you to incorporate them into your photo enhancement outsourcing requirements to get outstanding and exceptional outcomes. However, if you are not completely ready to start implementing them in your projects without making any mistakes, then there is also a second option that is worth considering. You can always go for a reputed company that is specialized in offering high-quality photo editing services to get your work done with perfection. Speaking of Photoshop, you can also check out our guide to download all available versions of Photoshop for free. Whether you just want to give it a go or looking to buy a program that can best suit your needs, this article will surely get it covered.


